Customize work and resource details pages (Closed beta)
Important
-
This feature is currently in closed beta.
-
Beta features should be considered “in development” and may not be fully supported or complete.
-
Beta programs are invaluable for helping to validate the value and impact of features through feedback and insights. If you would like to participate in beta programs and access this feature, please contact your Skedulo Customer Success Manager.
Note
- This feature is only available on the Skedulo Pulse Platform.
Overview
This feature replaces tab configuration and allows administrators to customize how job and resource details pages appear for different user groups based on their role.

Prerequisites
To use the page configuration settings, users must have the Administrator role.
Open the page builder
There are two different ways to access the page configuration functionality:
-
From the admin settings:
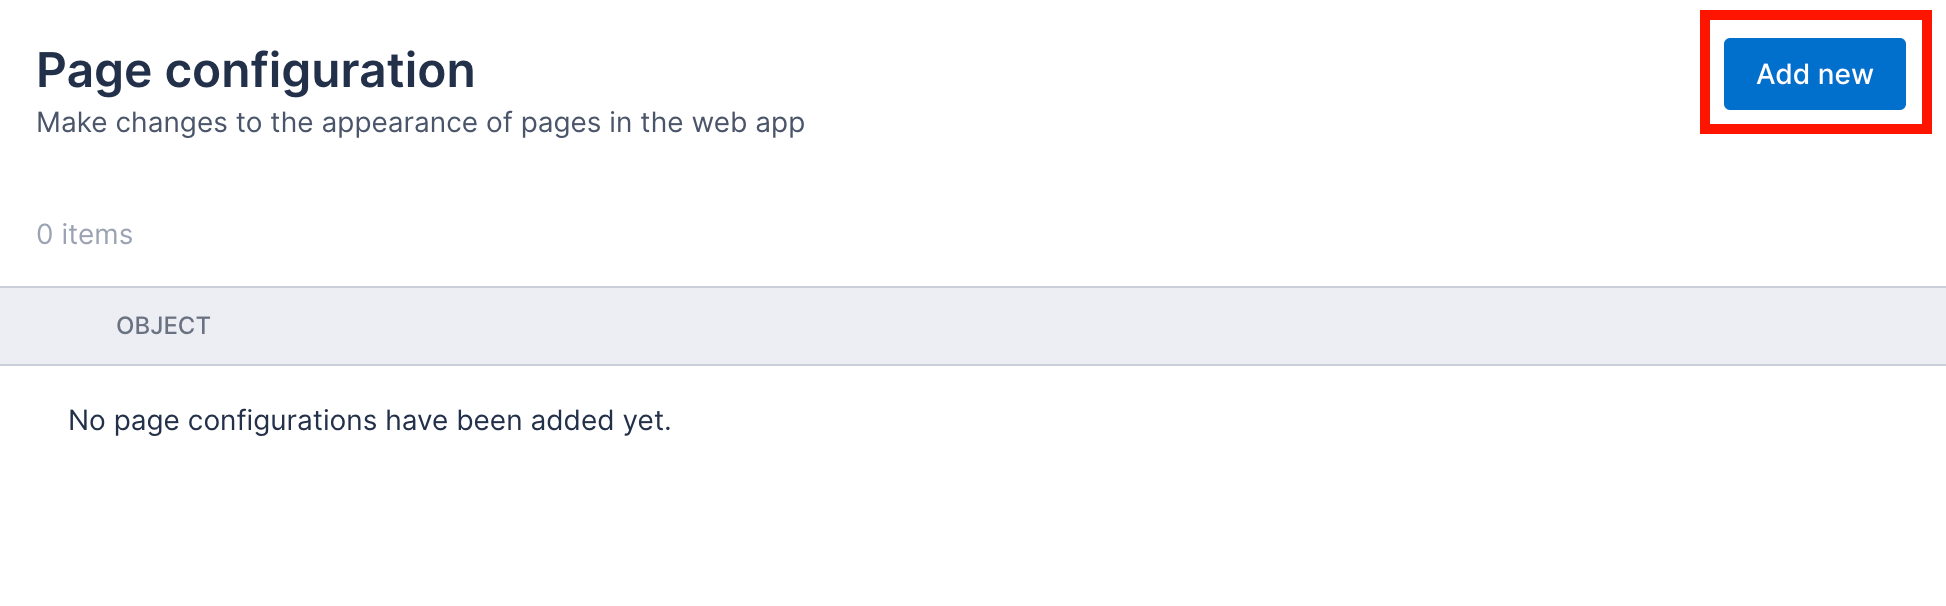
a. Navigate to Web app Settings > Web app configuration > Page configuration.
b. Click on an existing job or resource configuration, or click Add new to create one.
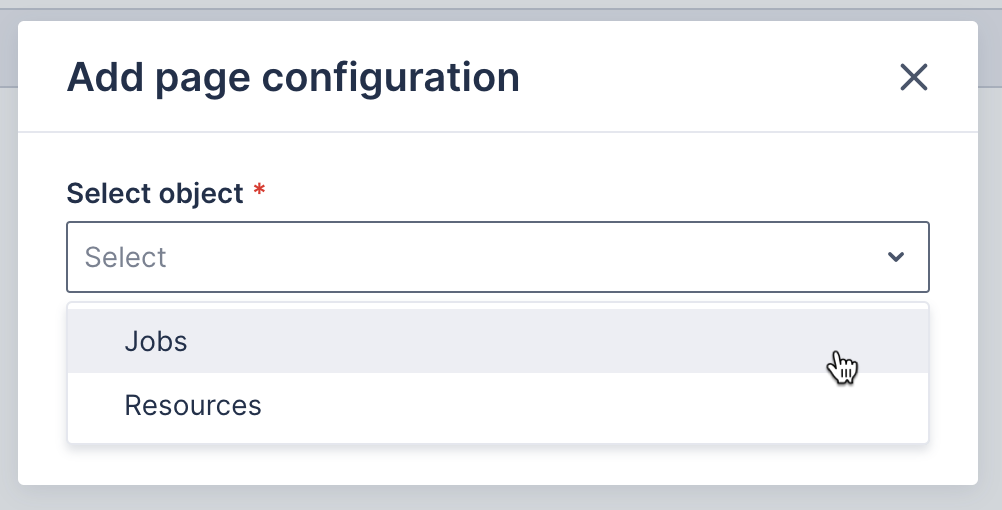
c. If adding a new configuration, select the object for which you want to configure the details page.
d. Search for a job or resource record to use as a preview when making changes.
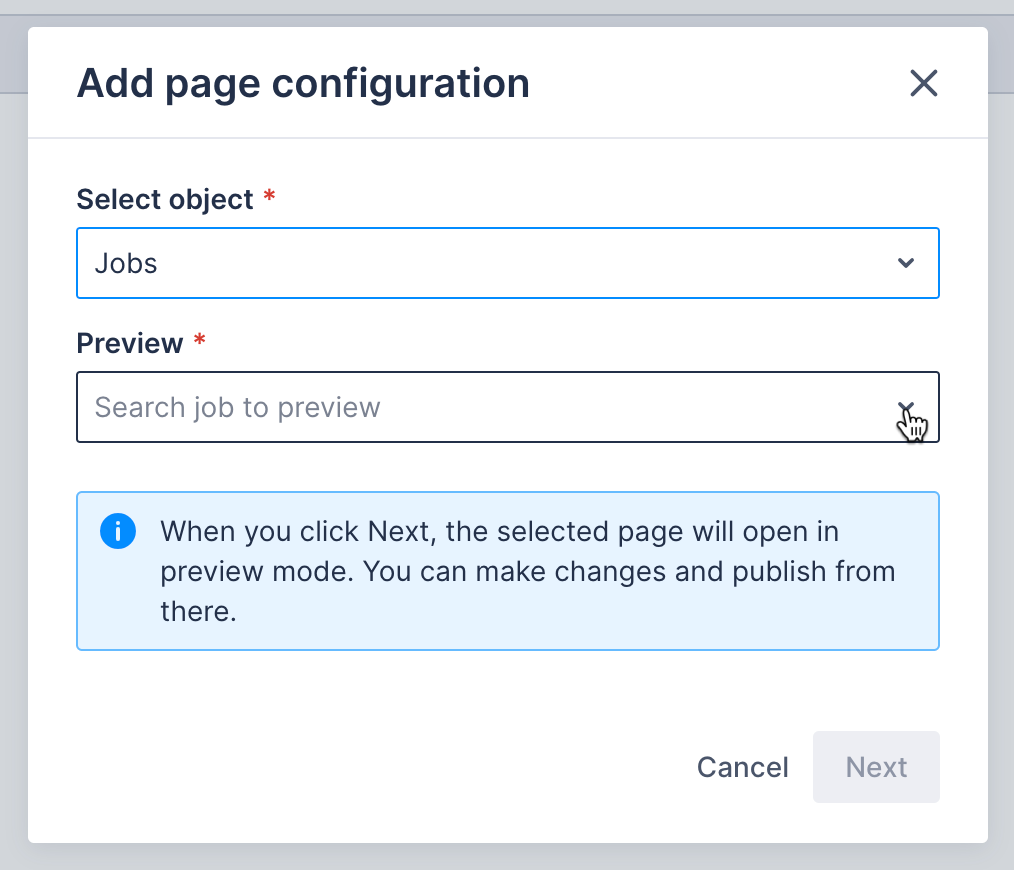
e. Click Next.
-
From any job or resource record’s details page: Navigate to a job’s or resource’s details page and then click the settings (cog) icon in the bottom-right corner.
Get to know the page builder
Note
If you navigate away from the page builder without publishing, your changes will be lost.The page builder has three zones:
- The top bar
- Two configuration panels
- The bottom reset button
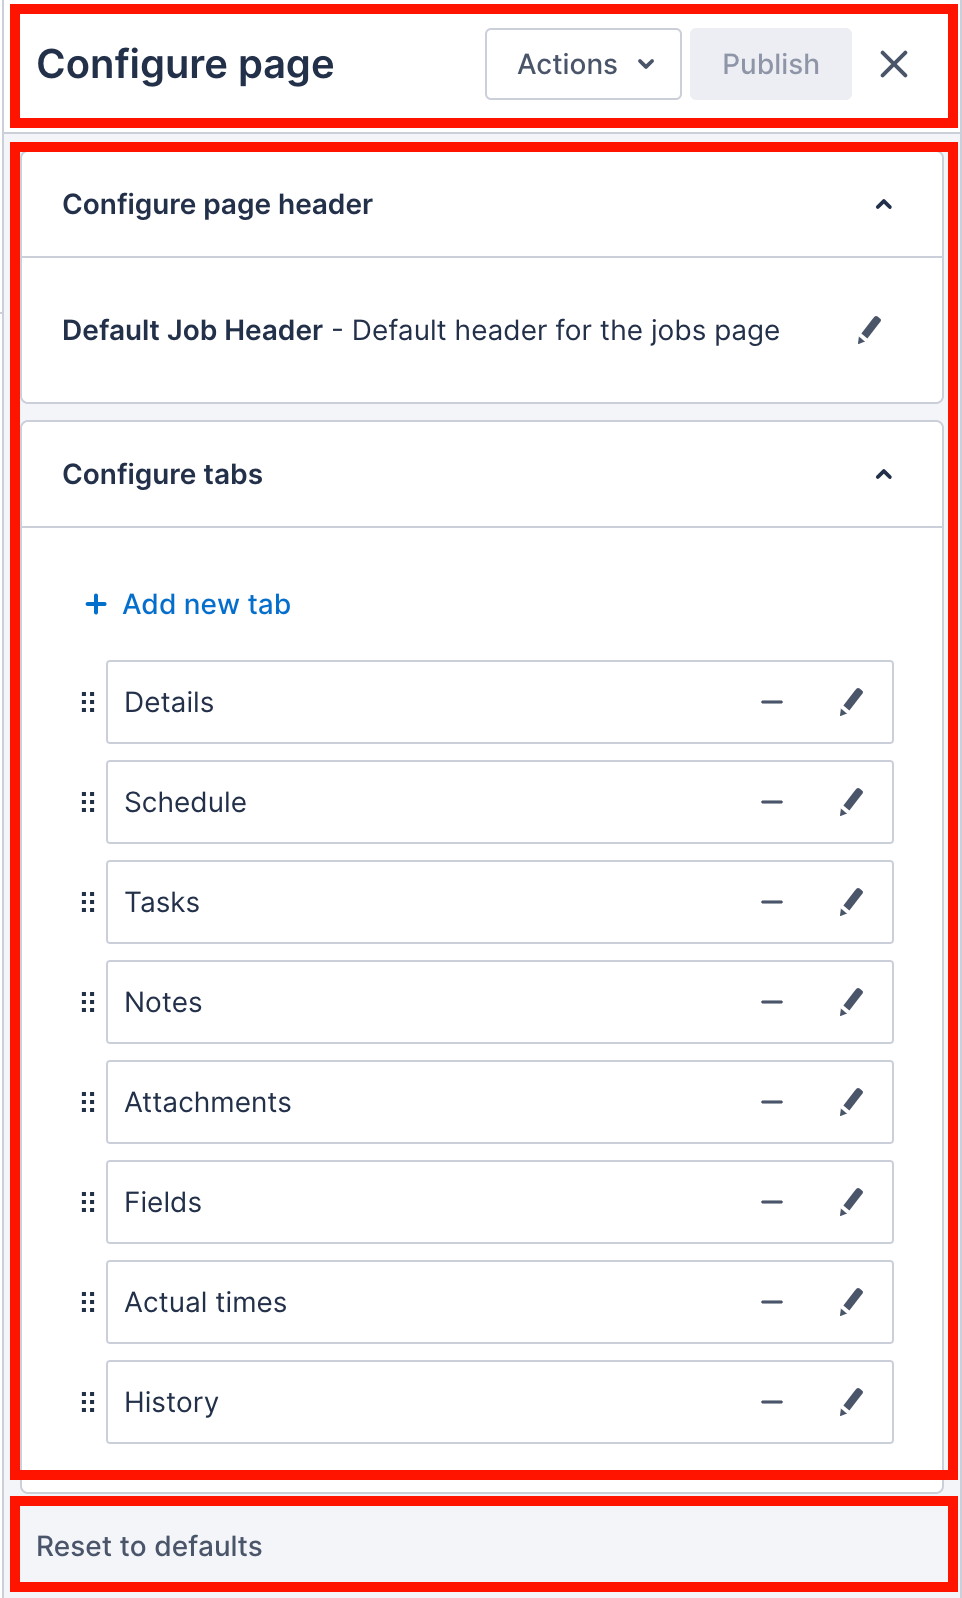
Top bar
The top bar has two buttons with the following functionality:
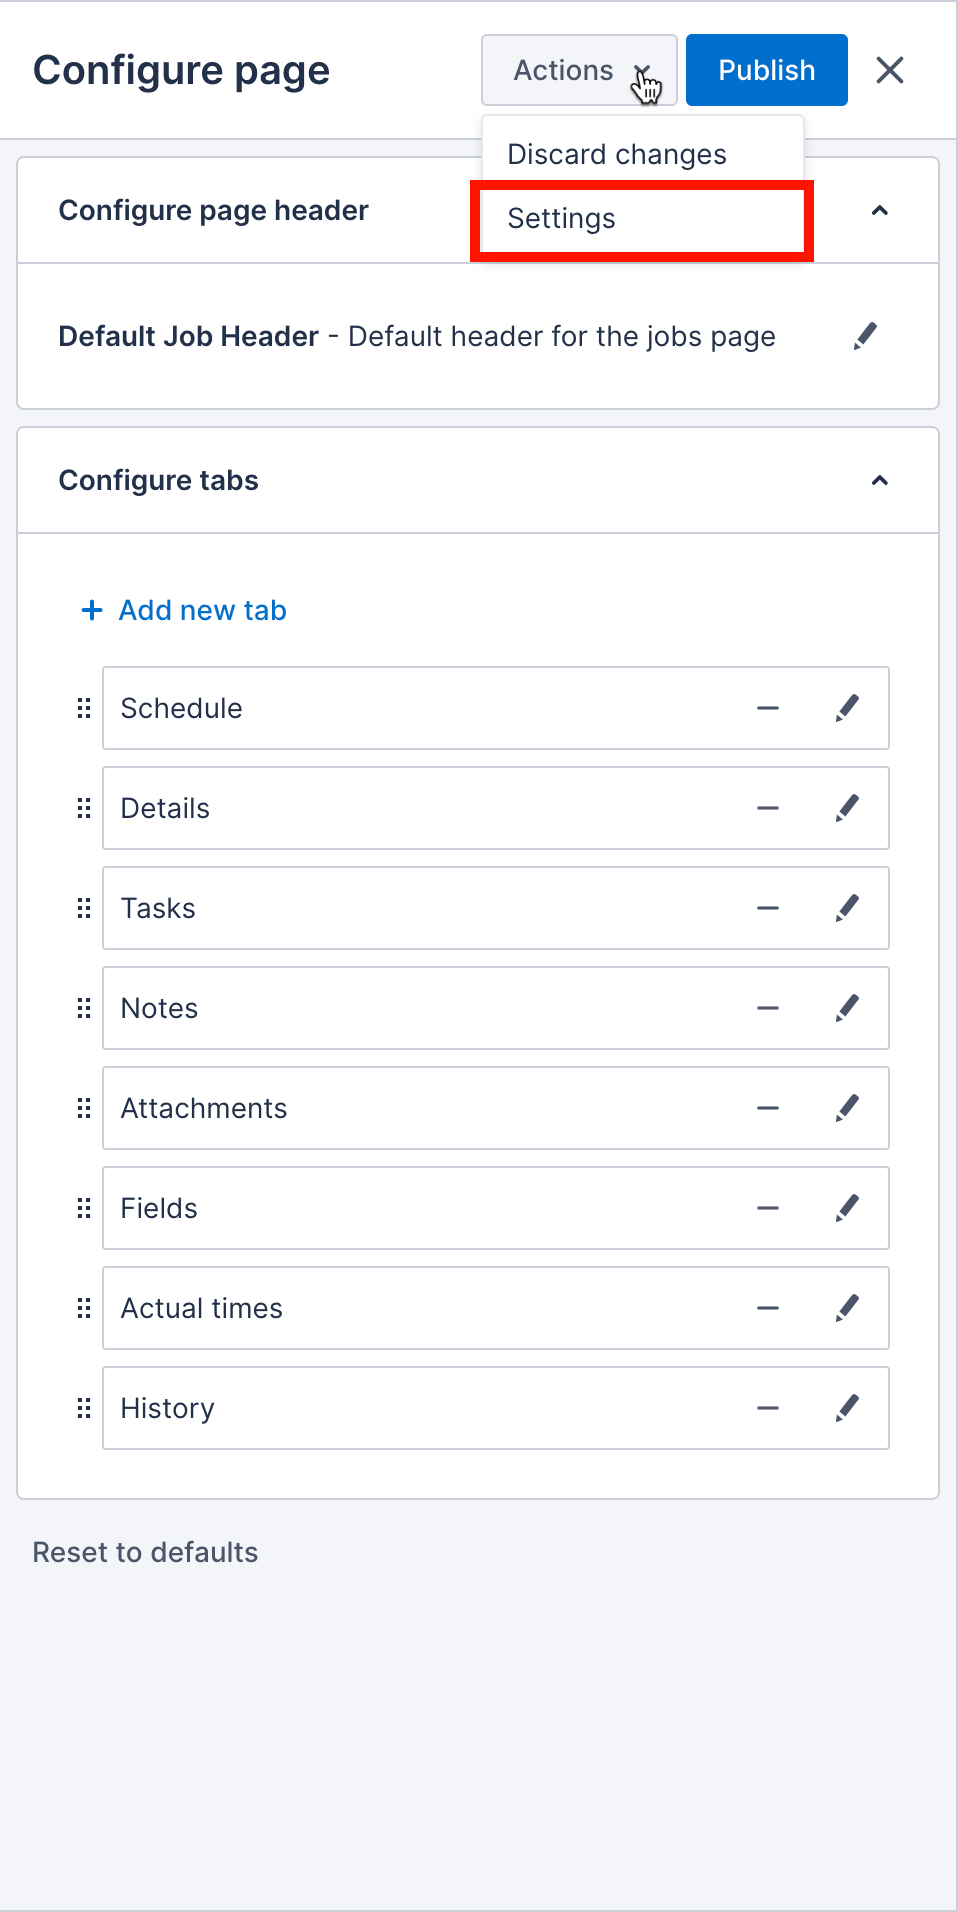
- Actions drop-down with the following options:
- Discard changes - to return the builder to the configuration values that are currently applied in your team.
- Settings - to assume a different role from your own with which to view the preview so that you can test whether you are happy with how the page will appear to different user groups before you publish.
- Publish - to apply your configuration changes across the team. This should only be clicked when you are happy to make changes that could apply to multiple users.
Configuration panels
There are two configuration panels in the page builder:
- Configure page header - where the header of the details page can be customized.
- Configure tabs - where there are configuration options for each tab in the page. You can customize the tab label, reorder the tabs, specify which roles that are able to see the tab, and apply conditional logic to control when the tab appears.
Bottom reset button
Clicking Reset to defaults will return the page builder to the page configuration that Skedulo provides by default.
Customize the details page header
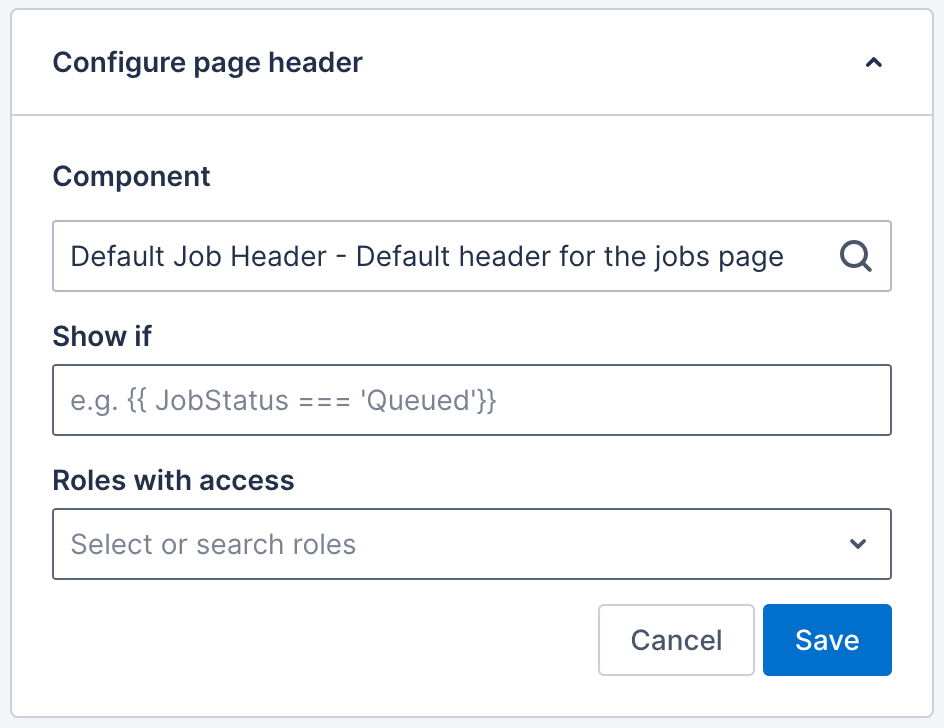
To customize the details page header, do the following steps:
- In the page builder, under Configure page header, click the Component field and enter the name of the component you are looking for, or scroll to view options.
- Select the component you want to apply. Additional fields may display, depending on the component and what it consists of.
- In the Show if field, add logic using mustache notation if you require the heading to only appear under certain conditions.
- Click the Roles with access dropdown and select the roles that you want to be able to access the tab.
- Click Save to update the preview. This will not impact the record at all and the appearance of all records will only change after publishing the changes you make.
- Configure the tabs if required and confirm you are happy with the configuration by clicking Actions > Settings to look at the preview as a user with another role.
- When happy with your changes, apply them to the team by clicking Publish.
Customize the tabs on a details page
There are a number of ways that you can customize the tabs on the job and resource details page.
Reorder tabs
To reorder the tabs, do the following steps:
- In the page builder, under Configure tabs, click and hold the reorder icon on the tab you want to move.
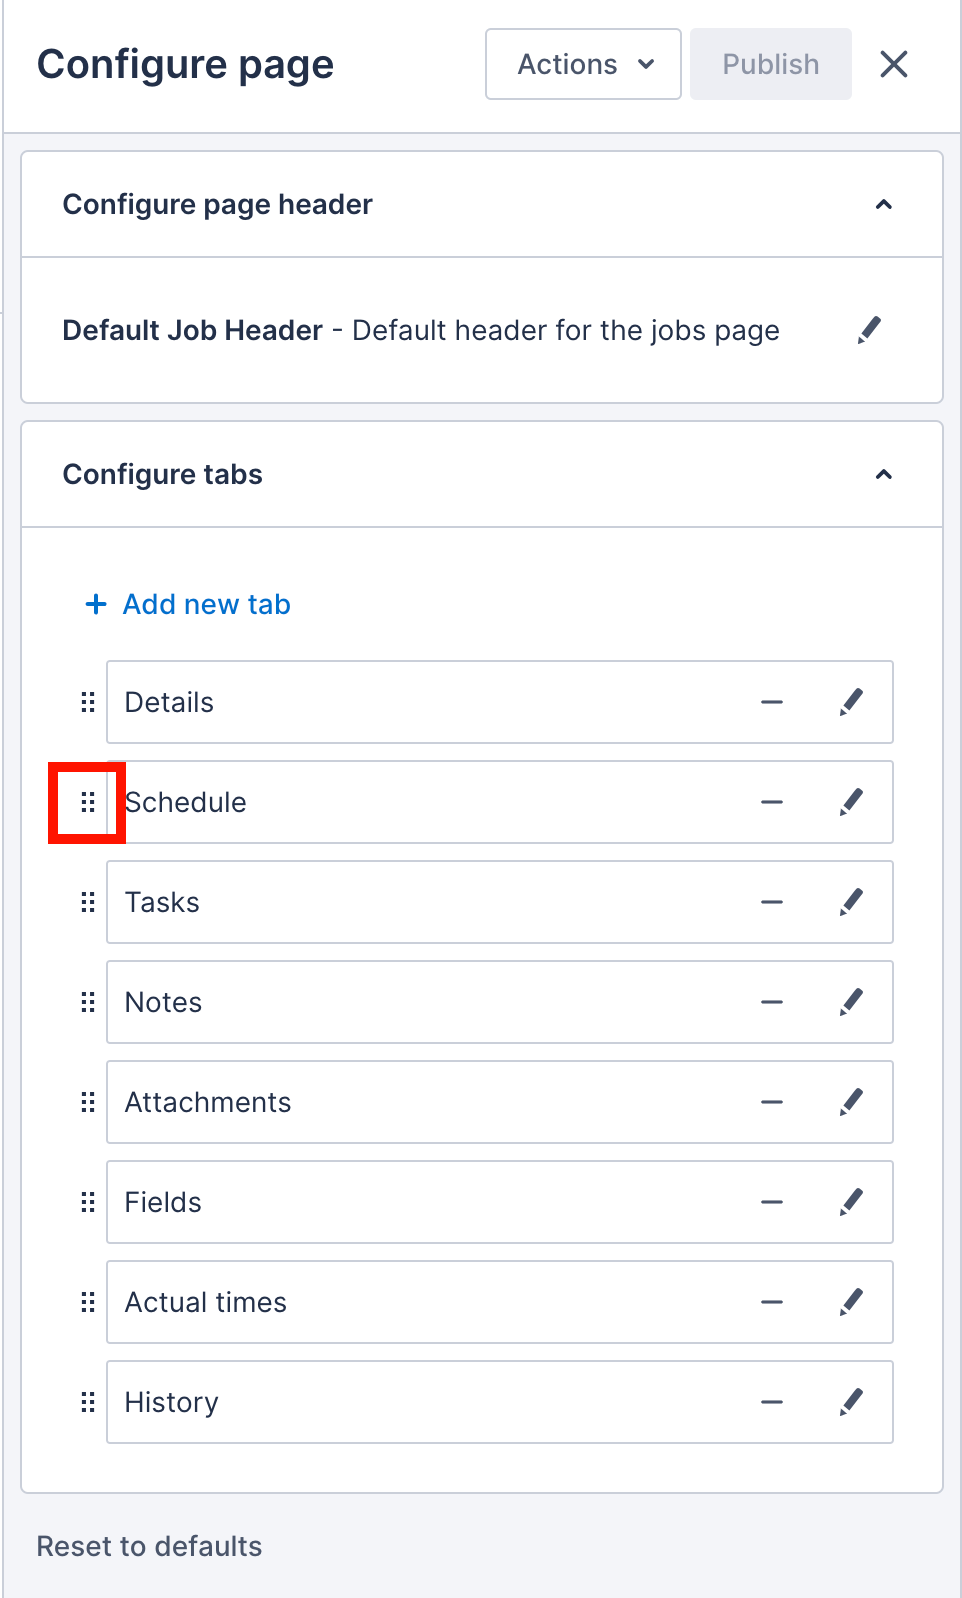
- Drag the tab to a new position in the list of tabs and release the click. The preview updates immediately to reflect the new tab order.
Change the label on a tab
To change the label on a tab, do the following steps:
- Click the edit icon on the tab you want to change.
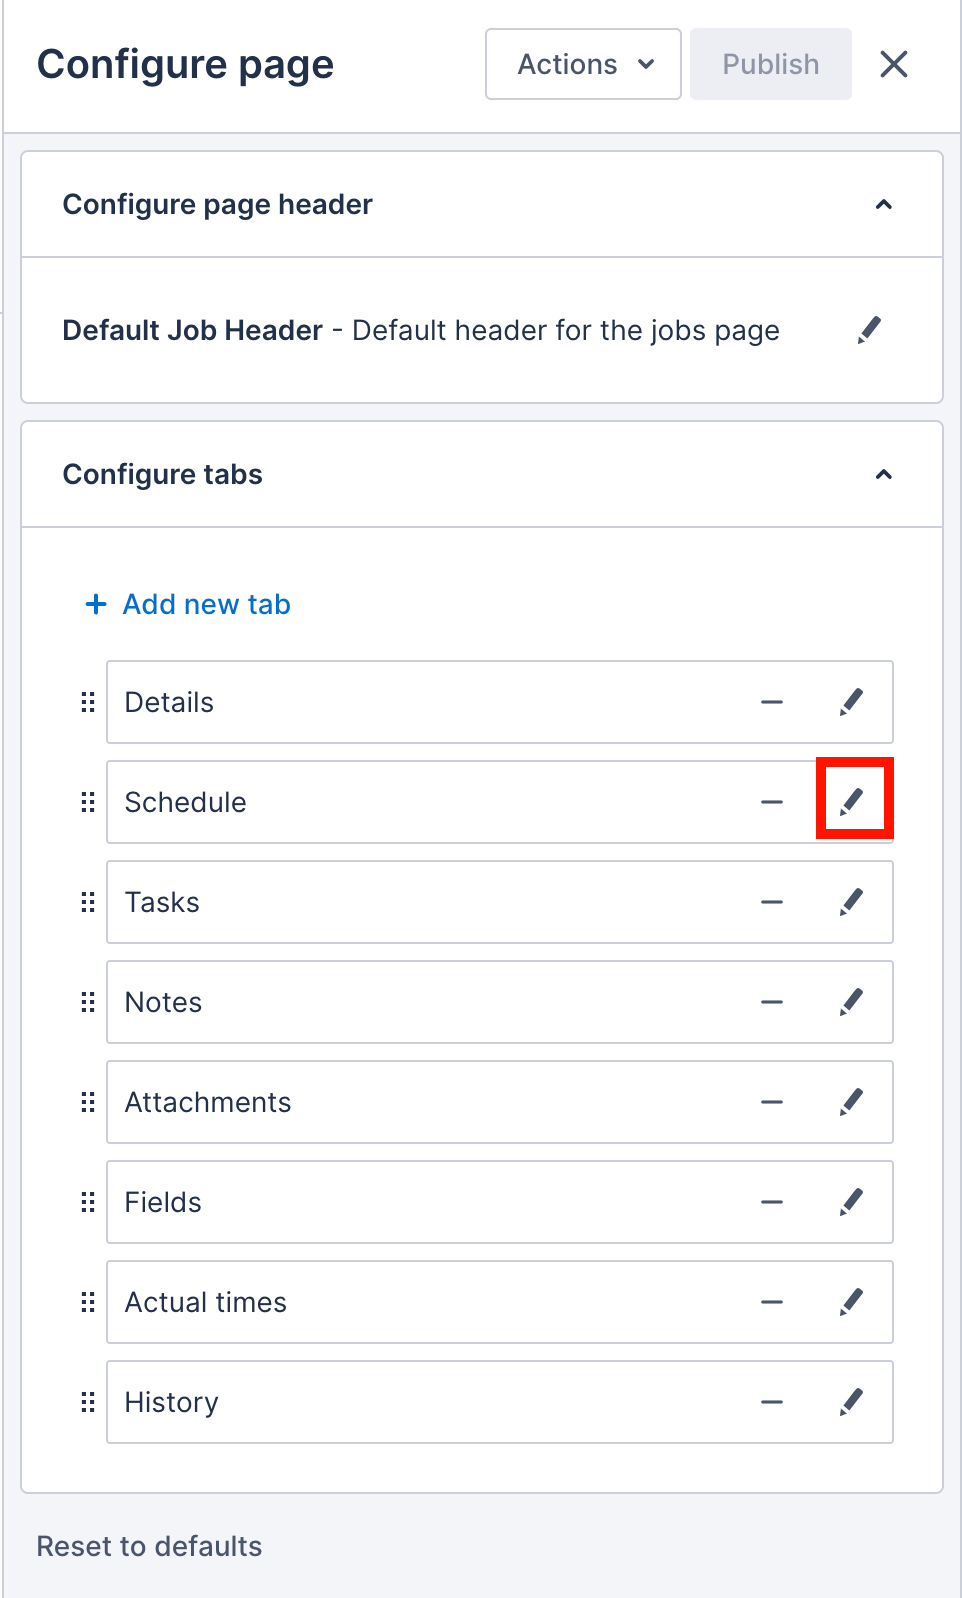
- Under Tab label, enter the text you want to appear.
- Click Save to update the preview.
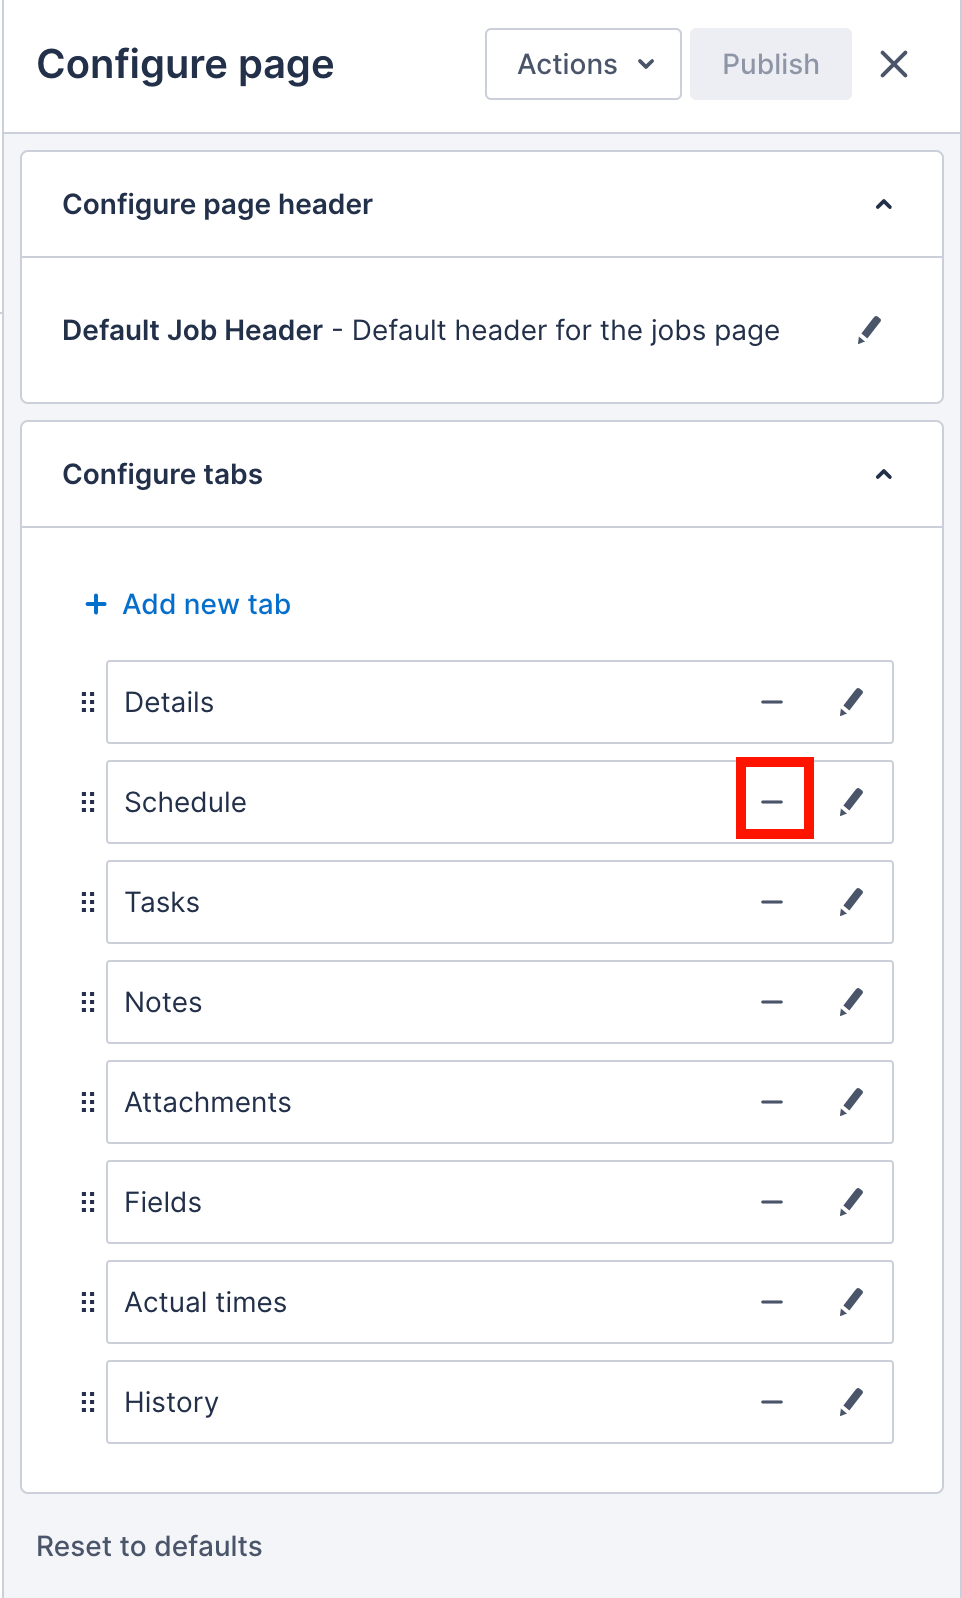
Remove a tab
If a tab is not needed at all, you can completely remove it from your team by clicking the remove icon.
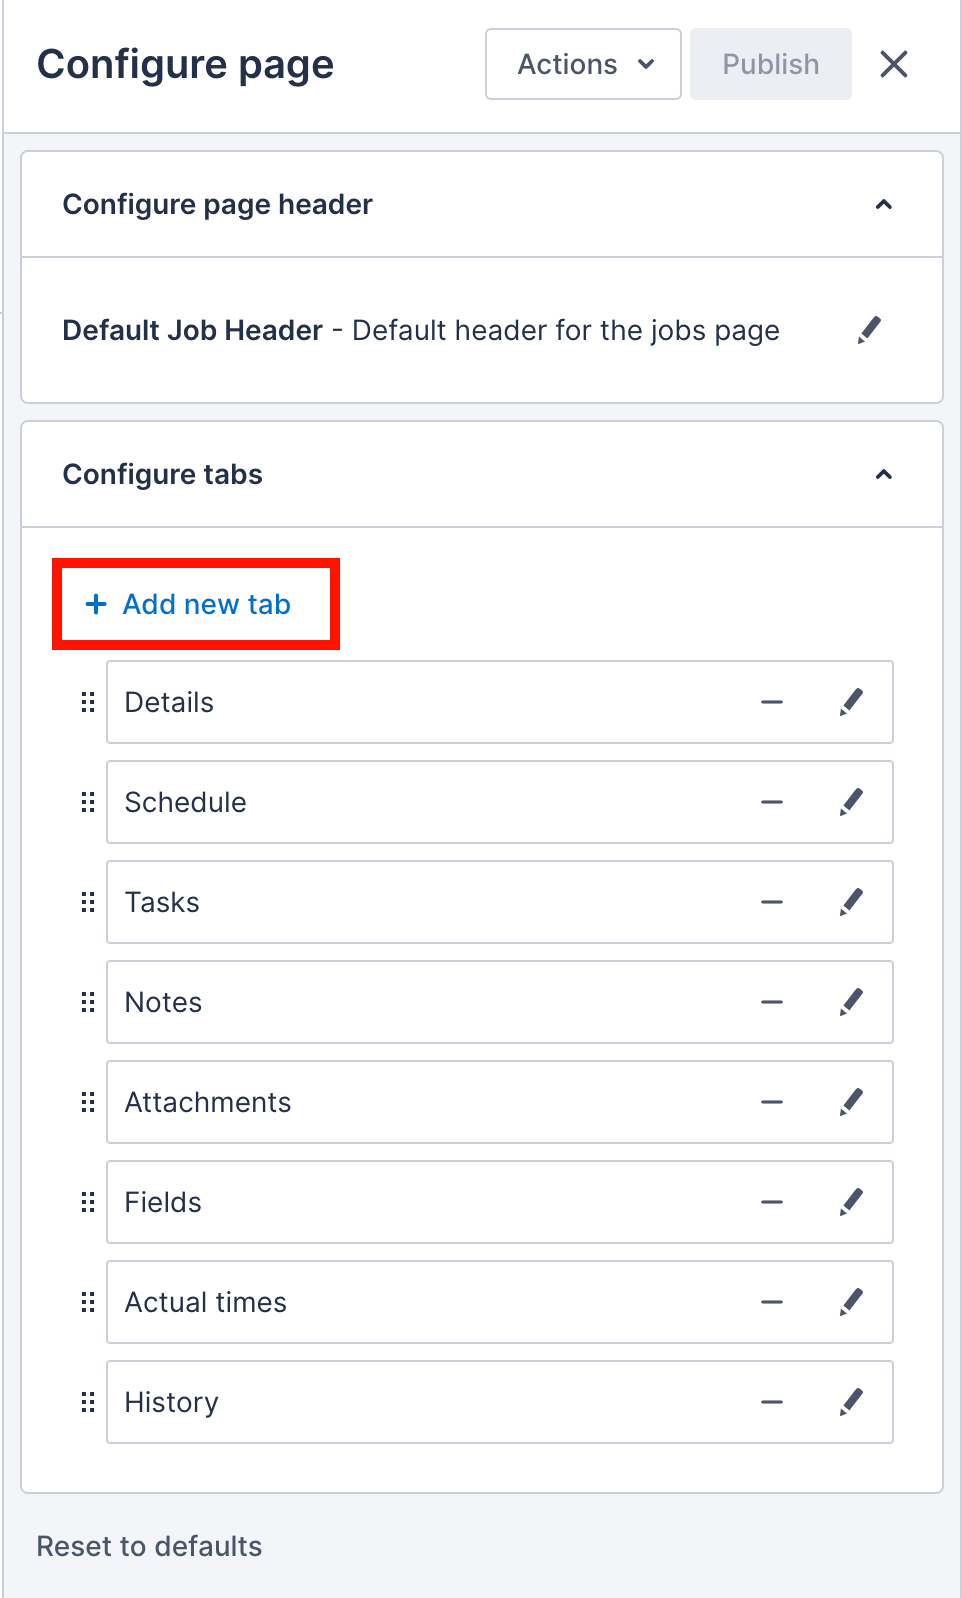
Add a new tab
To add a new tab, do the following steps:
- In the page builder, under Configure tabs, click Add new.
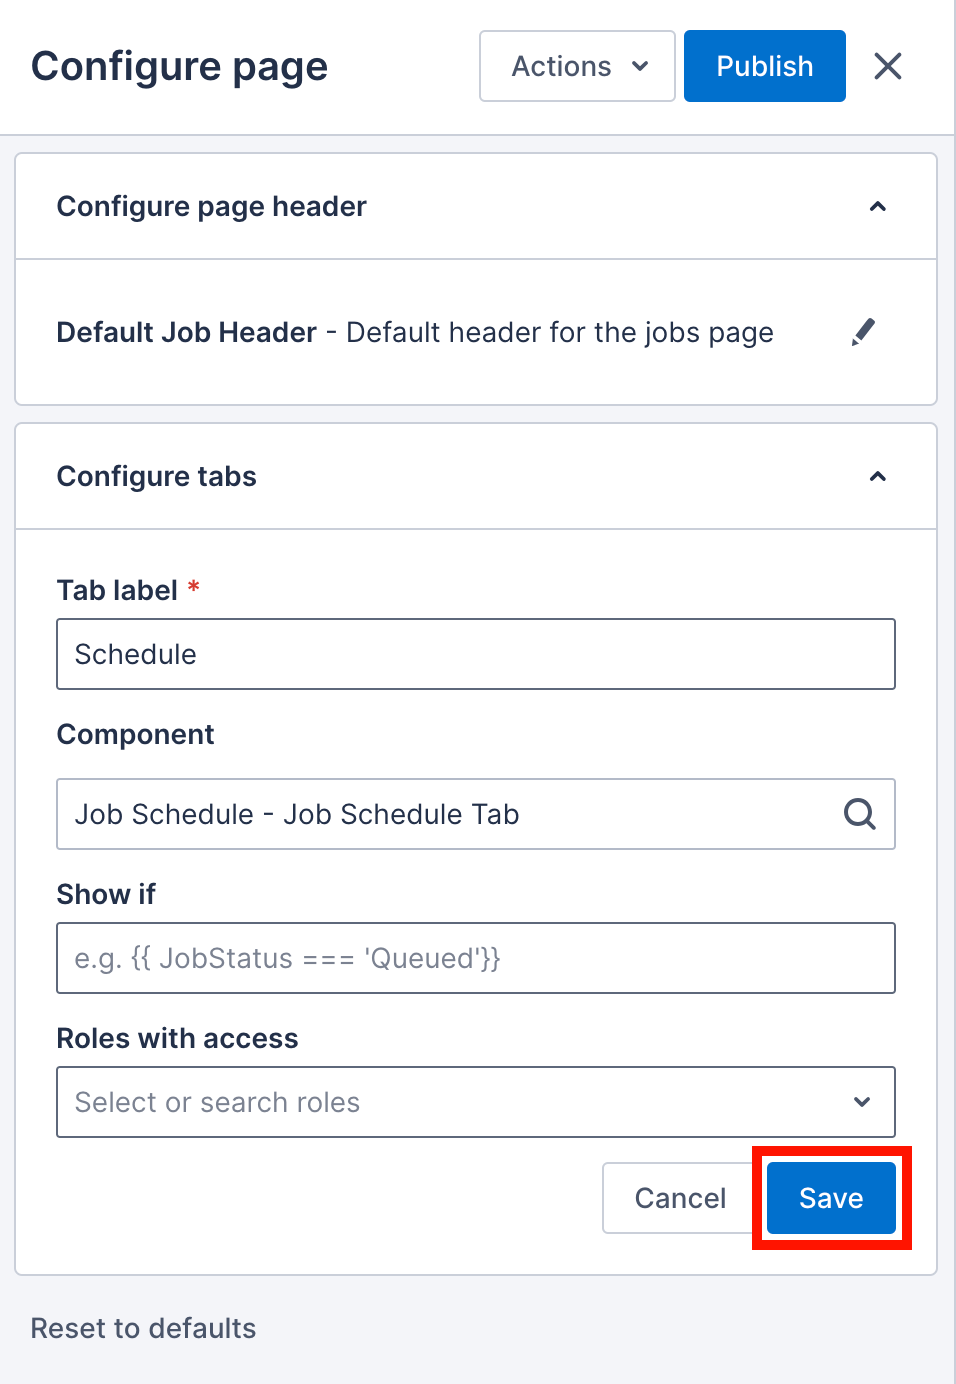
- Enter a Tab label.
- Click in the Component field and search for the component you want to appear in the tab. Additional fields may display, depending on the component and what it consists of.
- In the Show if field, add logic using mustache notation if you require the heading to only appear under certain conditions.
- Click the Roles with access dropdown and select the roles that you want to be able to access the tab.
- Click Save to update the preview. This will not impact the record at all and the appearance of all records will only change after publishing the changes you make.
- Configure the other tabs if required and confirm you are happy with the configuration by clicking Actions > Settings to look at the preview as a user with another role.
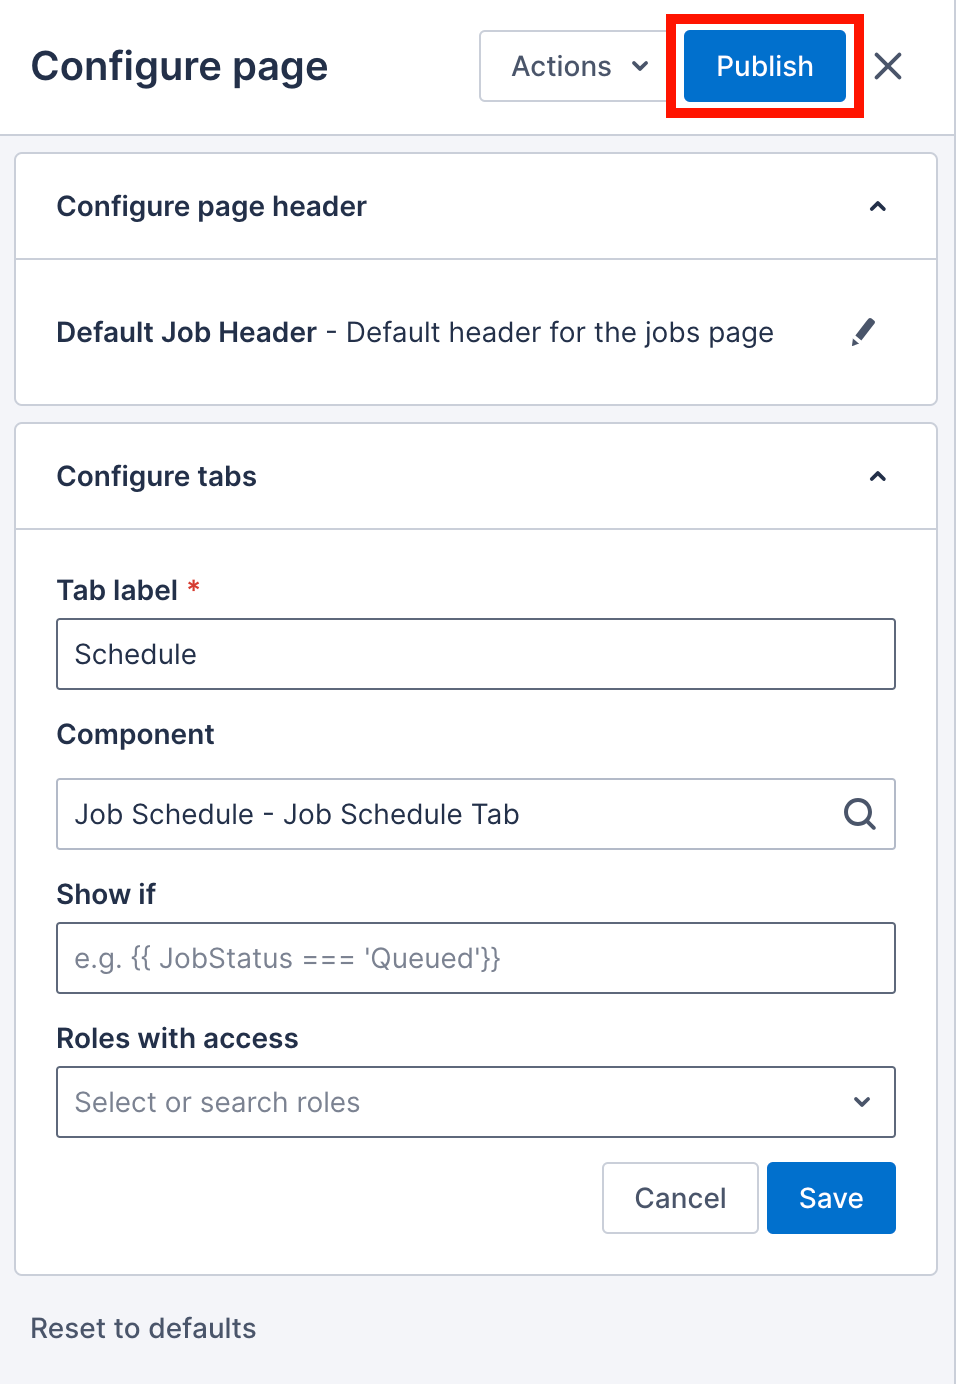
- When happy with your changes, apply them to the team by clicking Publish.
Hide a tab for some users
If you want a tab to only be accessed by a subset of users, you can utilize user roles to partition users into subsets and then configure the tabs to appear only for some users based on their role.
To only show the tab for some users, do the following steps:
- In the page builder, under Configure tabs, click the Roles with access dropdown.
- Select the roles that you want to have access to the tab.
- Click Save to update the preview. This will not impact the record at all and the appearance of all records will only change after publishing the changes you make.
- Configure the other tabs if required and confirm you are happy with the configuration by clicking Actions > Settings to look at the preview as a user with another role.
- When happy with your changes, apply them to the team by clicking Publish.
Hide or show the tab depending on certain conditions
- When editing the tab, in the Show if field, add logic using mustache notation if you require the heading to only appear under certain conditions.
- Click Save to update the preview. This will not impact the record at all and the appearance of all records will only change after publishing the changes you make.
- Configure the other tabs if required and confirm you are happy with the configuration by clicking Actions > Settings to look at the preview as a user with another role.
- When happy with your changes, apply them to the team by clicking Publish.
Customize the content that appears in a tab
You can choose which component and so which data appears in each tab from the following options:
- An existing tab component
- An existing page from the Skedulo web app
- A configurable list view
- The default header
- A web extension
Each component requires specific additional configuration. See the linked pages for each for more information about them.
To change the component used in a tab, do the following steps:
- In the page builder, under Configure tabs, click in the Component field and search for the component you want to appear in the tab. Additional fields may display, depending on the component and what it consists of.
- Complete the component fields.
- Make changes as needed to the Show if and Roles with access fields.
- Click Save to update the preview. This will not impact the record at all and the appearance of all records will only change after publishing the changes you make.
- Confirm you are happy with the configuration by clicking Actions > Settings to look at the preview as a user with another role.
- When you are happy with your changes, apply them to the team by clicking Publish.
Reset the page config
To remove all page customizations and return the details pages to the configuration provided by Skedulo by default, do the following steps:
- In the page builder, click Reset to defaults.
- If you are certain you want to reset the configuration, then click Ok on the confirmation message that displays. This step cannot be reversed or undone. The configuration returns to the default values immediately. There is no need to click Publish for this change to be applied.
Check how the config looks for users with different roles
To view the preview as a user with another role would see it, do the following steps:
- After making configuration changes, click Actions > Settings
- Select the role you want to view the preview with.

- When you are happy with your changes, apply them to the team by clicking Publish.
Feedback
Was this page helpful?